
Hey folks, it’s hard to believe we are in September already! It seems like just yesterday that I was hoping for hot weather (in this part of the world we’ve had a warmer than usual summer and it lasted more than a weekend)!
Before I get started, I just want to toss out a big thank you to everybody reading. I was recently honoured to be told I am receiving the SBE Educator of the Year award. On my own, it can be a struggle to come up with fresh content to discuss what’s useful to the folks in the field, so I really want to express my appreciation to our readers and to the folks who send me ideas, field stories, content or any other material to make our jobs easier. Thanks so much – you people rock!
That said, this has been a really busy summer, with state trade shows, several SBE Ennes presentations and a whole bunch of transmitter site visits. On the topic of transmitter sites, there are a few things I’ve encountered that I want to talk about here. Some of these things you will have seen me write about before, but they’re worth repeating.
First a safety tip. We are starting to come out of summer here in the frozen north and higher elevations are already starting to see snow, so if you live in a snow/ice prone area, it is time to make sure your site vehicles have winter survival kits in them and check to be sure they are well stocked. Long time readers will remember that I wrote about this before – you can find that article here.
Next, we need to discuss airflow. In the warmer months, a lot of sites are sealed and air conditioned, some use forced air to remove the heated air from the building. In either case, airflow is important – critical even. I see a lot of transmitter buildings where the room is at or below room temperature (68 degrees F, or 20 degrees C), but the transmitter is slowly cooking itself, because none of that cool air is making it to the transmitter air intakes – or it is blowing past the air intakes so fast that it is actually pulling air out of the transmitter, not forcing cool air in. Either situation is a problem.
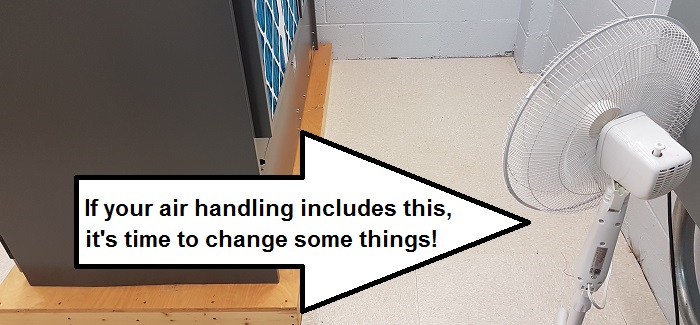
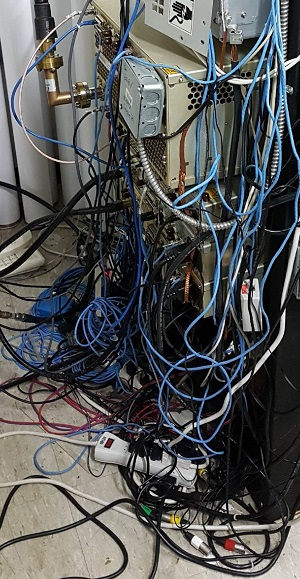 One of the other scenarios I encounter a lot is with smaller, rack-mounted transmitters. There are a lot of things to connect and typically it is being done under a time crunch (off air, construction permit about to expire, etc.). Thus, a lot of installs get done as quickly as possible, with the thought that, “we’ll come back later to clean it up”! Unfortunately, later almost never comes – and a lot of folks don’t realize that wires can also obstruct airflow. At the very least, tying wiring back to the rack rails can help to minimize this and improve cooling. As we put more computerized equipment, such as HD Radio Exporters/Importers and processor-controlled devices, into our sites, keeping air flowing through these items becomes even more critical.
Another thing that can help is leaving a rack space between items in a rack, to assist with airflow. Some equipment does not absolutely require this and will usually say so in the documentation, but a little additional airflow certainly doesn’t hurt when there are a lot of items in the rack, each generating a few hundred watts of heat.
One of the fastest ways to tell if you have enough airflow through a transmitter is something that will resonate with engineers experienced with tube transmitters… stack temperature. Stack temperature (exhaust air temperature, for the solid-state inclined) can help to tell you if the final in a tube transmitter is close to being properly tuned/neutralized. It will also tell you if you have proper airflow – and this will work for solid state rigs as well. Simply measure the ambient air at the air intake(s) for the transmitter and measure the exhaust air temperature. Subtract intake from exhaust to get the delta – the amount of temperature rise the air sees as it passes through the transmitter. Most manufacturers can give you at least a ballpark idea as to what this delta should be for different models. As an example, I tend to use a guideline of around 10 degrees C, or 18 degrees F for our older transmitters, a bit less for newer ones (unless they’re running HD Radio, in which case I’d expect it to be a bit more). This isn’t an exact number – and it does vary due to a lot of factors – but if I walk into a site and the air at the rear of the transmitter is 65 degrees and I measure 95 degrees at the output, that gives me an idea that some improvements could be made.
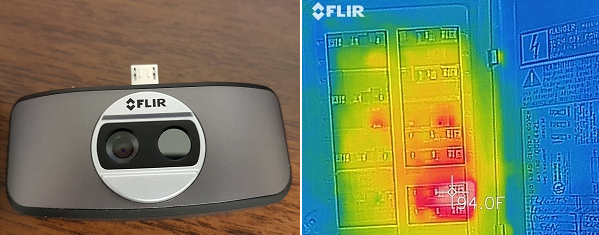
While we’re on the topic of heat, if you don’t have a thermal imaging camera of some sort in the tool kit, you probably should consider getting one! I’ve talked about my FLIR ONE before (you can find them at www.flir.com) and there are several others out there of varying quality and price. These things save transmitter sites… I dig mine out of the laptop bag almost every time I walk into a transmitter site – and it’s rare that I don’t find at least one breaker that’s showing a bit warmer than would be expected.
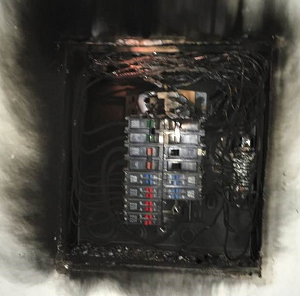 Warm breakers are typically the result of either loose wire connections to the breaker or worn pieces inside. Regardless, a breaker that is running much hotter than usual will typically continue to keep getting hotter, until it reaches the point of melting wiring and starting fires. It’s no secret that, during my sessions on maintenance, I continually talk about the need to periodically check hardware. However, a thermal scan is something that can be done with no additional tools – and usually does not even require you to take the cover panels off the equipment.
Finally, the fall season in the upper portions of the hemisphere is when our furry four-legged (or no-legged) friends like to find places to nest. What could possibly be better on a frosty morning than a nice warm transmitter shelter? I have written about this before – you can find that article here, but this is the time of year to pick up some stainless steel wool and a few cans of expanding foam insulation, then go around the site plugging holes that critters can get into. The stainless wool prevents them from chewing through and it doesn’t oxidize into dust, like regular steel wool. You can also get copper wool. Kudos again to the folks that pointed those items out to me when I wrote the previous article on this topic!
That about wraps it up for this issue – remember to keep things cool, keep them clean and keep them well grounded! It doesn’t matter what equipment (or whose logo is on it), those three things will go a long, long way toward helping you get the maximum life out of any piece of electronics! Stay safe, and happy engineering!
Jeff
Jeff Welton, has worked with Nautel for 25+ years. He is currently the Nautel Sales Manager for U.S. Central Region but previously he spent 16.5 years as a Nautel Customer Service Technician.
Submissions for this Tips ‘n Tricks column are encouraged and if published you’ll receive a Nautel T-shirt. Submissions should be typed and emailed, with high resolution photos, to [email protected] using the subject line Tips ‘n Tricks.
